IDSS Utility Functions allow you to access previously saved information. You can check the following files by selecting Utility Functions from the TOC:
Manage Saved Snapshot files
Manage Saved Freeze Frame Failure Record files
Scan Tool Preview
Graph Colors
Table of Contents Colors
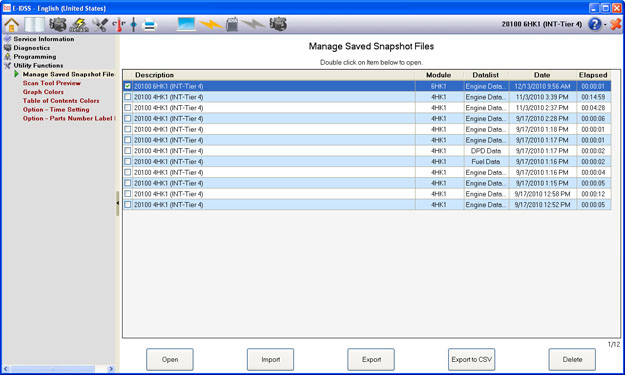
You can view saved Snapshots by selecting the Manage Saved Snapshot Files title in the TOC.
The Manage Saved Snapshot Files screen will display all the Snapshot files currently saved for viewing.
Select the file you want to "manage" by clicking in the box in the far left column. Then click on one of the options below (user options). To select all files, click the box in the title row.
The user options are as follows:
Open
Select the Snapshot you would like to open by clicking in the box in the row.
Click the Open button.
The saved Snapshot viewer will open.
Import
Click the Import button; this will open the “Select the DAT file to import” window.
Select the file you want to import.
Export
Click the Export button; this will open the “Browse For Folder” window.
Select the file you want to export.
Export to CSV
Click the Export to CSV (Comma Separated Variable) button; this will open the “Browse For Folder” window.
Select the file you want to export.
Delete
Select the Snapshot you would like to delete by clicking in the box in the far left column. You can select multiple files to delete at once.
Click the Delete button.
You will be prompted to confirm the delete process.
The Scan Tool Preview function allows you to view Data Display and Output Control Test content, without engine data, for all engines supported by IDSS.
Click the Scan Tool Preview selection in the TOC and then use the drop-down menus to select the engine you would like to view. Once all engine information has been selected, choose to view the Data Display for that engine and click Continue.
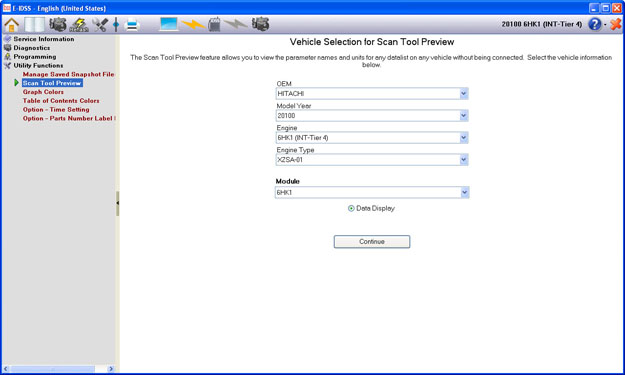
The data display for the engine you selected will display. You can select all data display and scroll to view all parameters included in each tab.

Click the Return button on the bottom of the screen to return to the previous page.
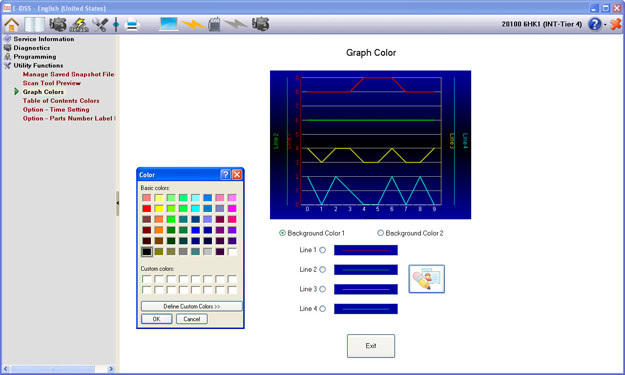
Click the Graph Colors selection in the TOC to customize the colors of the graph you are viewing. Select the line or background you want to change.
Clicking the color icon and a color screen display a pop up that will allow you to select the color you want for the background or graph line.

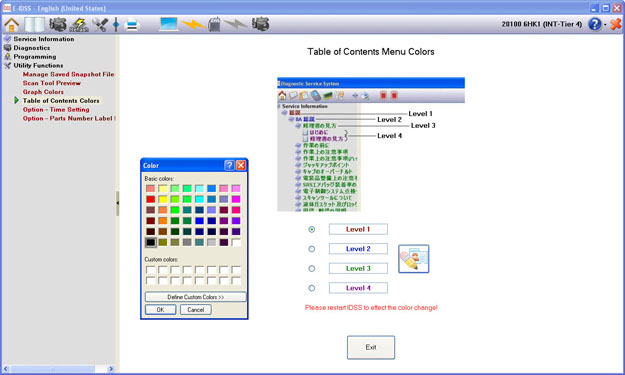
Click the Table of Contents Colors selection in the TOC to customize the colors of the TOC levels. Select the level you want to change.
Click the color icon and a color screen will display a pop-up that will allow you to select the color you want for that level.
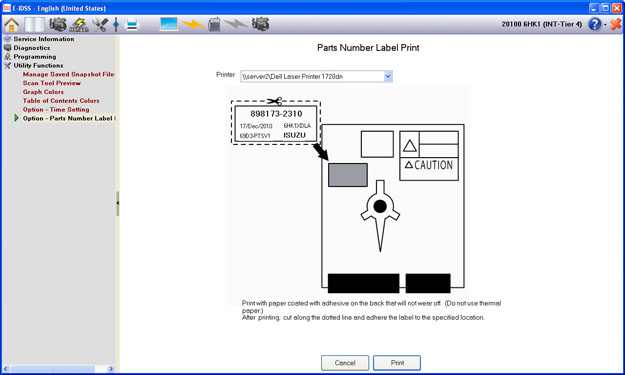
With the PC connected to the printer, prepare a label sheet. Click the Utility Icon in the tool bar. Click the “Options – Part Number Label Print” button on the screen to advance to the “Parts Number Label Print” screen. This screen displays the history data of reflashing. Select the item you want to print (enter a check in the box) and then click the “Next” button to advance to the print preview screen.
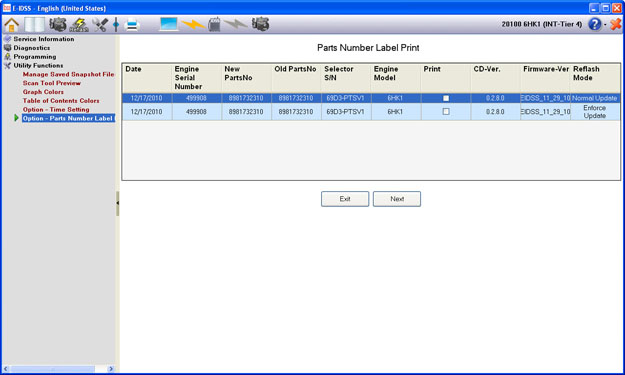
Choose the appropriate printer. Click the “Print” button to begin printing.